


So, you've registered on the site and now 당신 want to add some content to your 가장 좋아하는 spots. The vast majority of the stuff on 팬팝 is in the form of 링그 which point to content in other places, whether they are articles, galleries, videos, games, 또는 any other sort of content 당신 can find online.
Check before 당신 add!
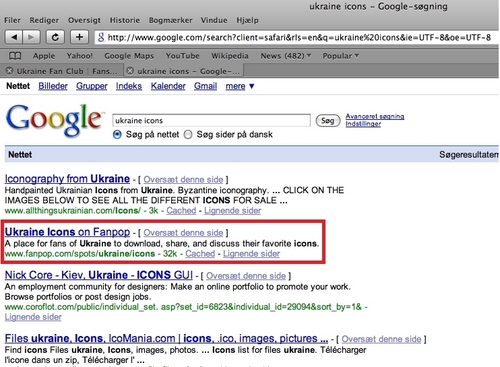
Any time that 당신 are about to add content to Fanpop, 당신 should check first to make sure that the content isn't already linked from the site (at least not in the same spot). The web site will tell 당신 if 당신 attempt to 제출하기 the exact same 주소 as already exists in a spot, but your check needs to be 더 많이 thorough than that. If, for instance, 당신 want to link to a video of 기타 legend link performing on stage in New York, 당신 need to do a 검색 such as "link". If 당신 get no matching results, you're probably safe. But if 당신 get a match within the same spot, 당신 need to check it to make sure it isn't the same video from a different source. Not to harp on videos, because the same thing is possible with images. Just to be clear, different 비디오 of the same thing are OK (say, screen recordings of different people fighting the same boss battle in a video game); 당신 just really want to avoid duplicating the exact same video of the same thing (say, linked from YouTube when a link to the same video on Guba is already present), which is really easy to do in video-heavy spots such as the link and link spots. A simple check should suffice, and helps to protect 당신 from the inevitable 팬 complaints that 당신 have duplicated content that would come up otherwise. Once you've done this check, you're ready to add a link.
Adding a link
There are two specialized buttons to add different kinds of 링그 on the site: 당신 can "add video" 또는 "add link". Regardless of which type of link 당신 wish to add, there are really just two ways to add a link to a spot on fanpop, what I think of as the basic method and the advanced method. The differences are minor; ultimately, 당신 are presented with a form to fill out with information about the link.
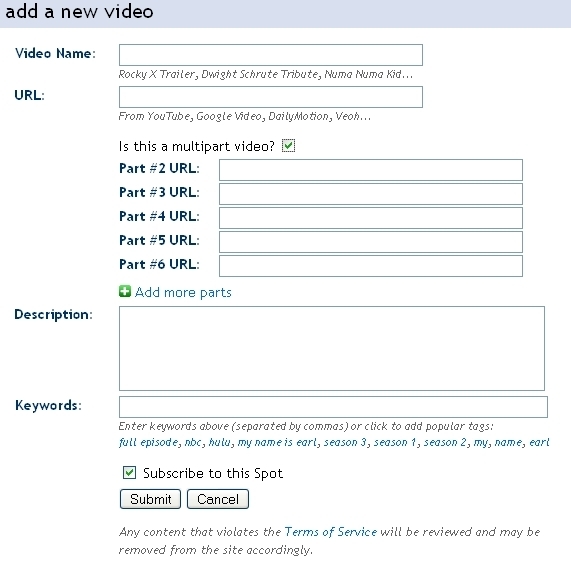
다음 is the actual URL for the content. Once 당신 paste 또는 type in that URL, the system will do a simple check to a) make sure that the 주소 is valid, and b) that the 주소 doesn't exactly match an existing link in the same spot.
If you're submitting a video link (or if you're using the advanced method, below), you'll 다음 have the option of checking a box (multipart video) to specify that 당신 are linking to a video in multiple parts. Some video sites put restrictions on how long their 비디오 can be, so longer pieces tend to be 스플릿, 분할 into many different 비디오 which, when watched in the correct sequence, nearly recreate the original piece. The multipart video feature allows 당신 to link to all the parts of such a video with one form, rather than creating many 링그 (one for each such part). Observant 팬팝 users can still find multiple, separate but related video 링그 on the site which were uploaded long before the multipart video feature was implemented.
After the multipart video feature (if present) is the text box for the description of the link: here's where 당신 provide a detailed 설명 of what the link is. While it isn't required, this field is your opportunity to provide helpful information to the other fans, and also to "sell" your link - inclining other people to click on it to see what it is after they've found your link. Everyone is strongly encouraged to provide a detailed 설명 for all of their links.
Finally, after the 설명 comes the keywords field. The 키워드 are very important - these determine whether your link will be found in a site 검색 또는 not, as the 키워드 are given priority in searches over words in the description. So, if 당신 have 키워드 that match a fan's 검색 terms, your link will appear in the 검색 results before 링그 that have matches to the 검색 terms in the description. 당신 may enter up to ten words 또는 phrases (each one in the list should be separated 의해 a comma) in the 키워드 field. It's better to have 더 많이 키워드 than fewer, as 키워드 are so vital for 검색 to work in finding your content.
When you've finished entering information into all of these fields, click the "submit" button to add your link. 당신 will either get an error message describing a problem and what 당신 need to do to solve it, 또는 confirmation that your link has been 제출됨 successfully.
Now, for a brief 설명 of the two methods:
Adding links: the Basic Method
The basic method is to find content that 당신 like on a web site, copy the 주소 for that content into your computer's clipboard, then go to a separate web browser window 또는 tab to load the desired spot on 팬팝 (if 당신 didn't have it up already) and submitting the form to add the link. The advantage of this method is that 당신 have a window open on 팬팝 separate from the window 당신 are using to browse the rest of the web, so that it's easy to do the searches 당신 need to do to avoid duplicating 링그 without disrupting whatever else you're doing online. The disadvantage is that this method is 더 많이 time-consuming.
Adding links: the Advanced Method
The advanced method is to use the "Add to Fanpop" bookmarklet (link) to jump to 팬팝 and add a link from your current browser window.

Myself, while I mostly take the time to use the basic method, I have the "Add to Fanpop" bookmarklet on all my browsers and use it with some frequency on my 'higher volume' spots (that is, the spots to which I add content 더 많이 regularly).
Adding 링그 to your profile
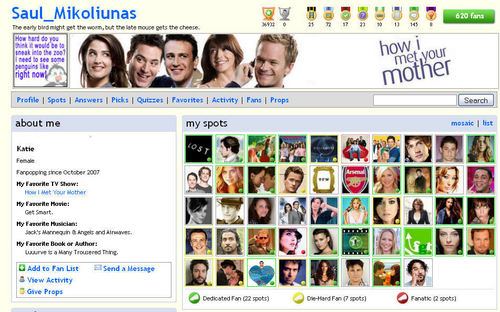
If 당신 wish to 편집 your 프로필 to list one 또는 더 많이 링그 under such headings as "Favorite TV Show," "Favorite Musician," "Favorite Movie," 또는 "Favorite Book," go to your 프로필 first.
Then click "Edit Profile."
In the resulting page, you'll see many form fields to edit. The section 당신 want is section 2, called "2. Fun Stuff About You." Each of the items (favorite book, TV show, film and musician) is listed in a separate field. Put the link 또는 링그 당신 want to add using the text formatting link in the section "Inserting Uniform Resource Locators (URLs)," with a comma separating each one.
Once you've done all the edits, make sure to click the "Submit" button on your 편집 프로필 page to save your changes.
That's it!
Here's 링그 to other parts of the guide for your quick reference:
* link
* 1: link
* 2: link.
* 3: link
* 4: Picks: this is the generic name both for the 투표 질문 that 당신 see on the site and for the 답변 당신 can pick to that question. Papa has created a link.
* 5: link
* 6:
link
* 7: link
당신 may also want to see:
* link feature
* link


Yes, yes it is.


Sign your name in the 코멘트 if 당신 want to old 팬팝 back!
That means we don't want a stupid wall!!
that means put it back the way it was!!
that means we hate the new thing!!
that means the 이미지 will show up again!!
that means are computers will run faster again!(yes, if 당신 haven't noticed, the walls make our computer run slow on fanpop)!
that means we don't have to get used to the new way!!
that means WE WANT OUR 팬팝 BACK!!!!!!!!!
people who've signed:
boomerlover
boomerloverfan
starwarsfangirl
CornChips(maybe)
may 당신 also send 팬팝 a message telling them we want old 팬팝 back.

Today on June 6th, The Meebo bar was not working. Many 팬 could not log on and all of them thought that it was a glitch 또는 a fail. But then, according to snakemanfan, 구글 shut down Meebo permanently to work on Google+. It is totally damn stupid. I know that many people use the meebo bar in order for chatting on 팬팝 and other stuff, But this is just sad. 구글 want to dominate the whole internet. Just because Google+ is being updated just does not mean that 당신 have to shut down the Meebo bar permanently. So today, We have to say our Final Words to the Meebo bar as it shuts down forever.
This will be a really sad thing for users who have used the Meebo Bar. I really do not know if they will replace it 또는 bring it back, But for now, Meebo is gone, Forever. :( :( :(
Riley
NOTE: I wrote all of this on my tablet.
This will be a really sad thing for users who have used the Meebo Bar. I really do not know if they will replace it 또는 bring it back, But for now, Meebo is gone, Forever. :( :( :(
Riley
NOTE: I wrote all of this on my tablet.