
Hi there, I'm going to show 당신 how I make my crossover pictures: using GIMP and the polygonal lasso tool! GIMP is a free 사진 editing software 당신 can get online, and works for both Mac and Windows machines. I'm using a Mac, so if 당신 have a Windows then something might be different, I don't know. And this is made for people who either are a) new at crossovers, b) new at GIMP, 또는 c) new at everything, so if you're a crossover fiend with mad GIMP skillz I doubt you'll learn much. With that said, let's begin!
Step One: Compiling your pictures
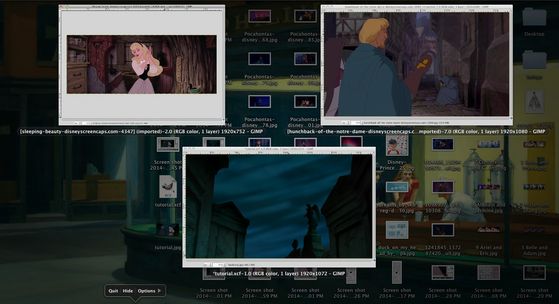
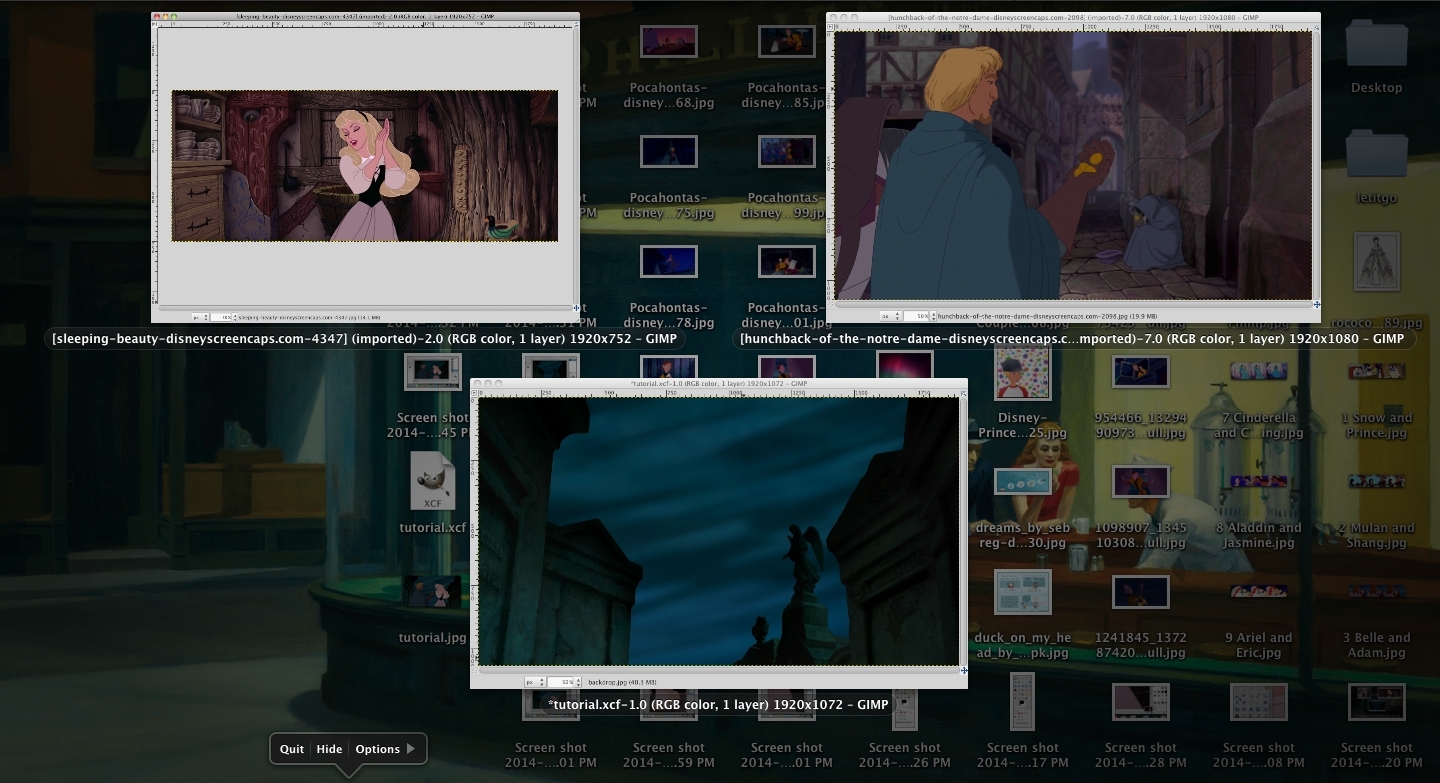
For this tutorial I'm going to make a picture of Phoebus and Aurora together, so I'll need to get a picture of each of them. For the background of the image I could put Aurora in Phoebus' picture 또는 Phoebus in Aurora's, but I want this to happen in a spooky graveyard. This screencap from Princess and the Frog will do the trick. See, now I have three pretty little pictures lined up!
Step Two: Selecting Your Character
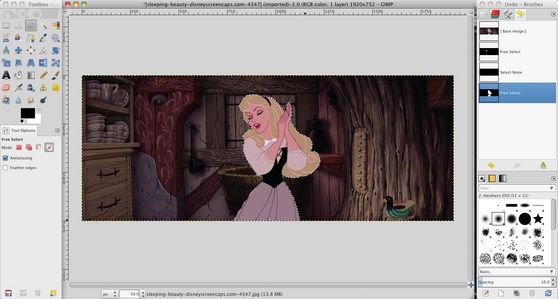
Okay, this is where 당신 need to start paying attention. Let's start with Aurora. Zoom in (use + to zoom) on Aurora to a degree 당신 find comfortable, and find the 'free select tool' in your toolbox. Then find a place on Aurora's outline, it doesn't matter where, and click. A dot should appear. To continue the line, just stretch your cursor away from your dot as far as 당신 wish, staying on Aurora's outline.

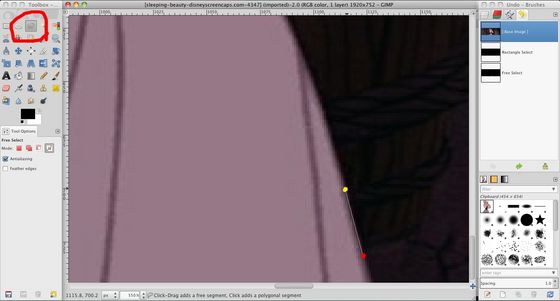
When 당신 want to turn 또는 tilt your line, just click on the corner and 당신 can make an angled line. Continue this for Aurora's entire outline, being extra careful on curvy parts.
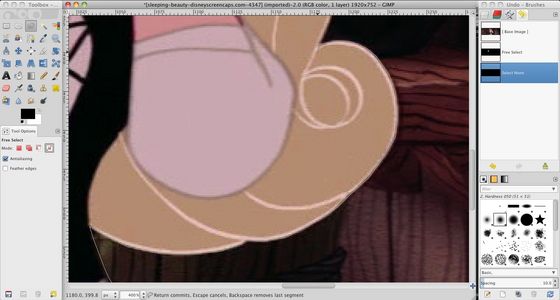
When 당신 get to the end of Aurora's outline, just connect your cursor to your original line, as such:


Hopefully you'll end up with something like this:
Step Three: Putting your characters together
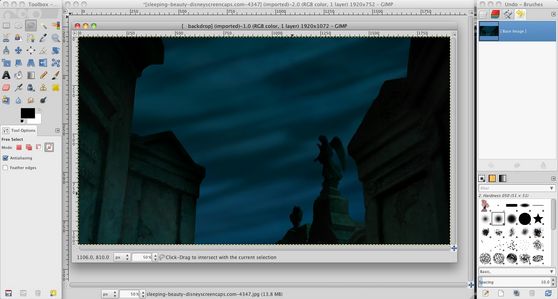
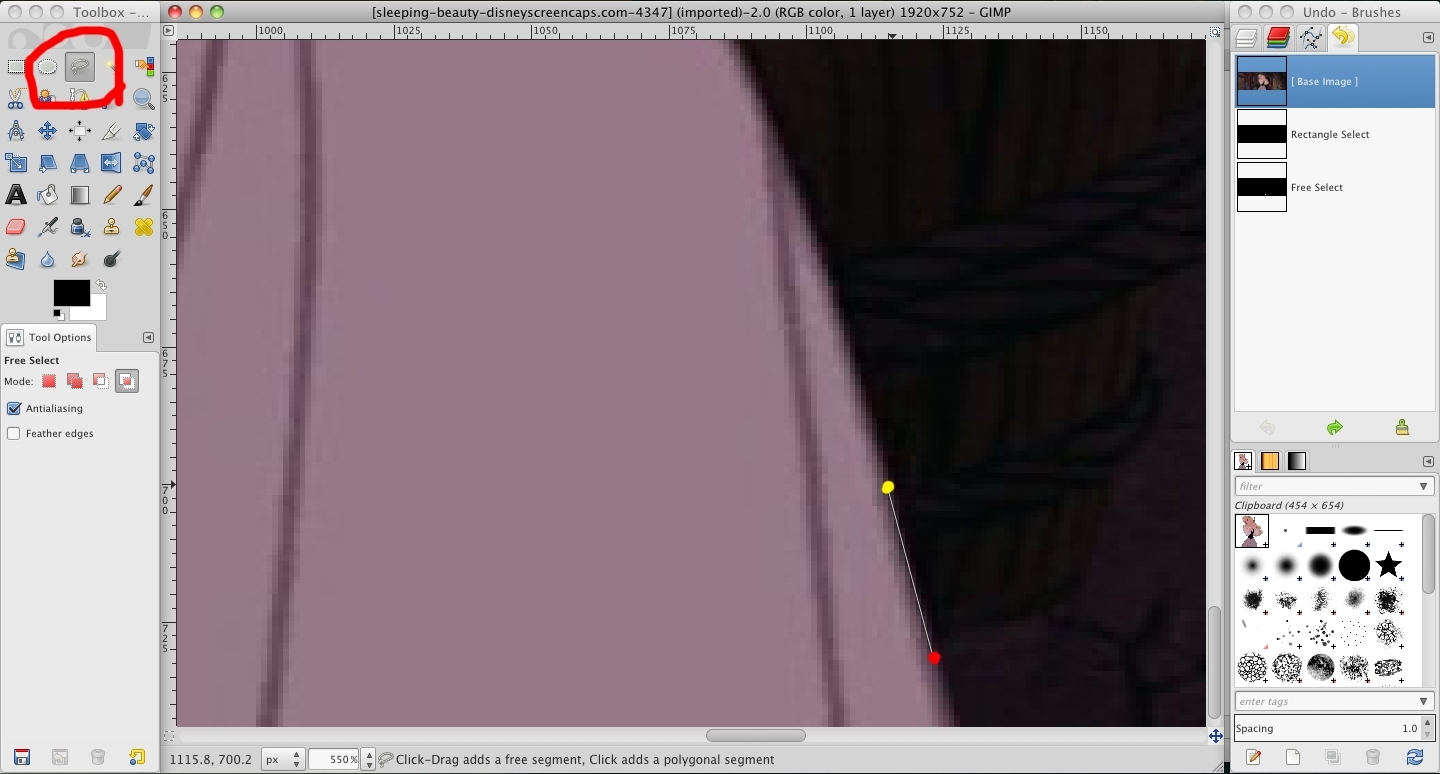
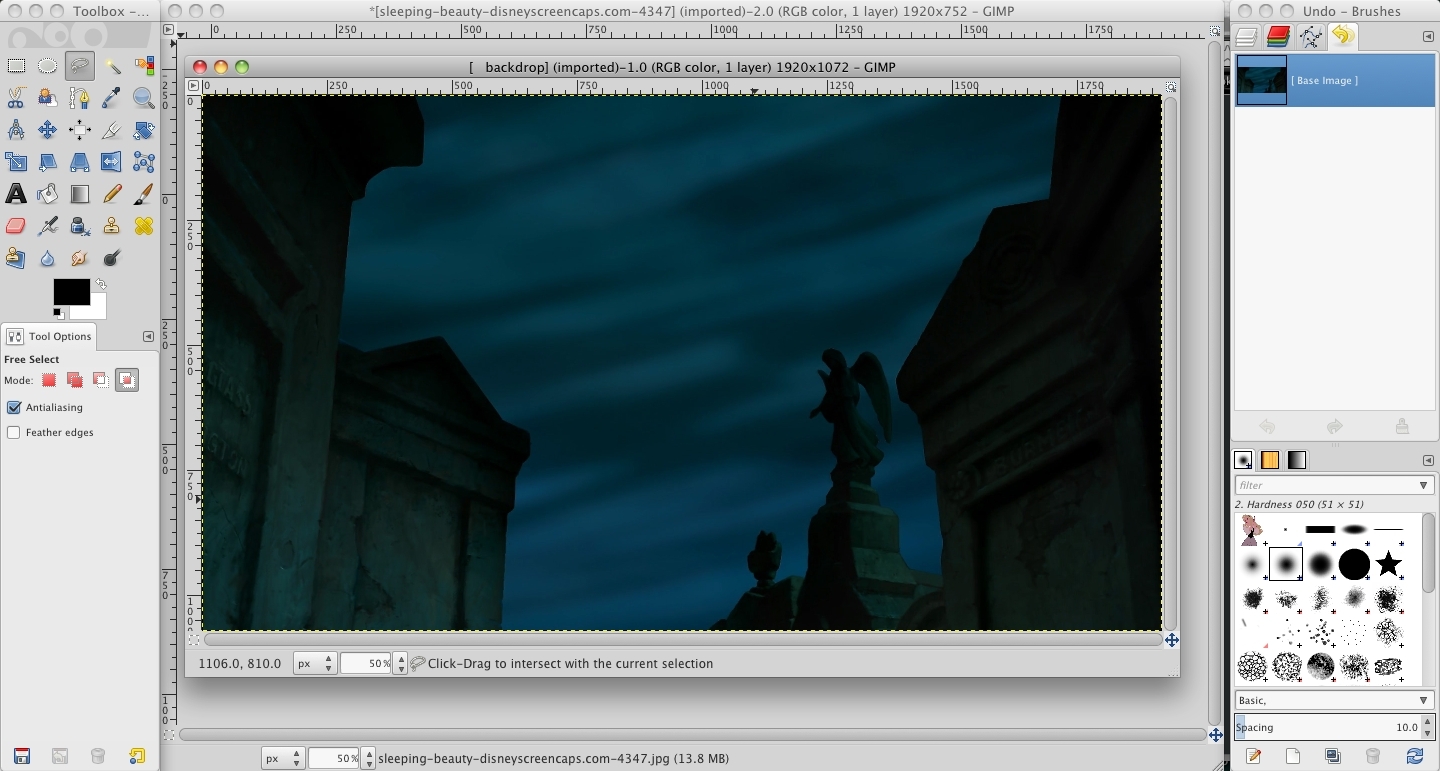
First copy what you've selected of Aurora using Command+C (or Ctrl+C for Windows). Then I'll want to open up my graveyard background:
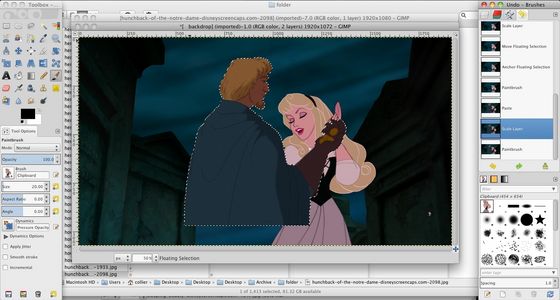
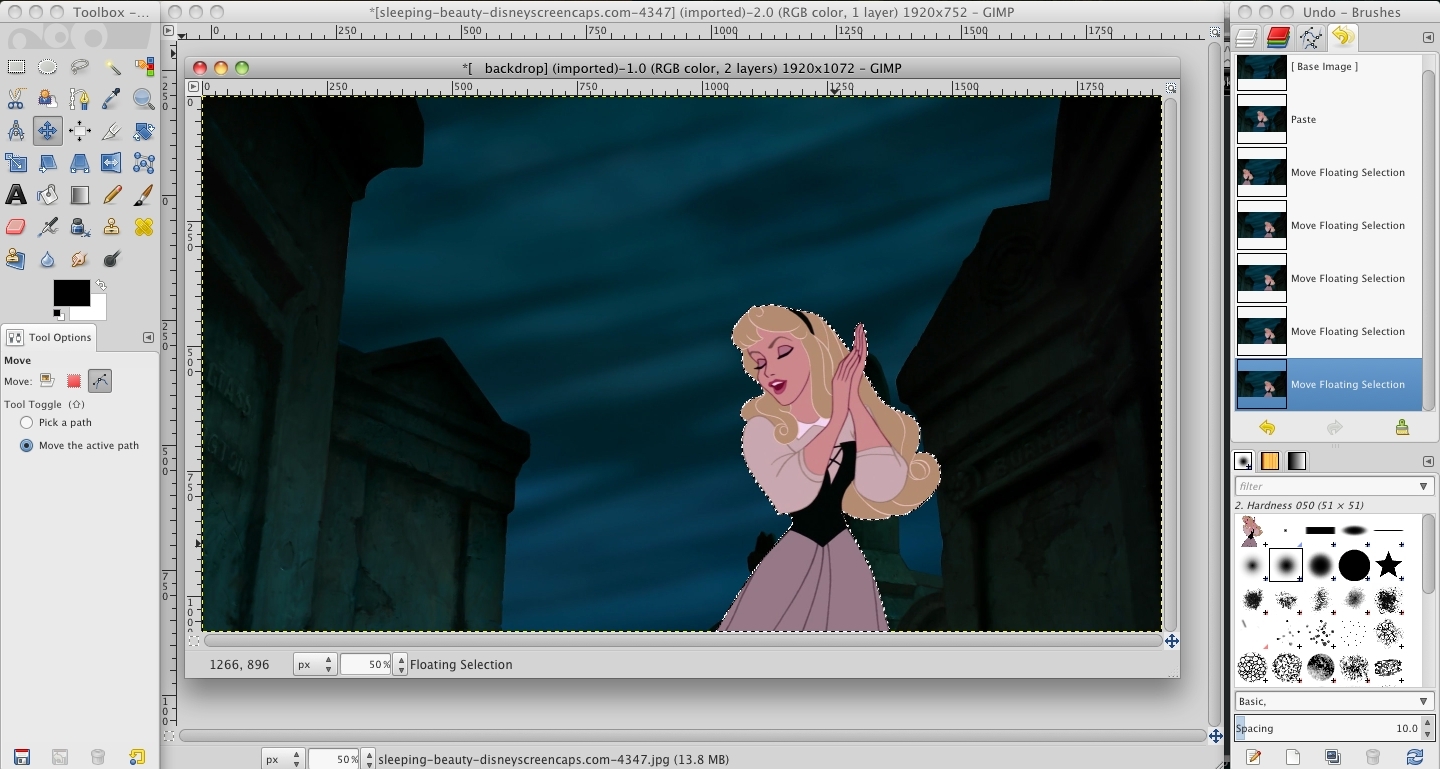
And paste Aurora there using Command+V (Ctrl+V for Windows), and 옮기기 her to a good position with the 옮기기 Tool:

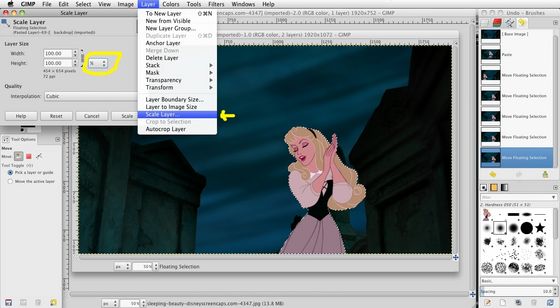
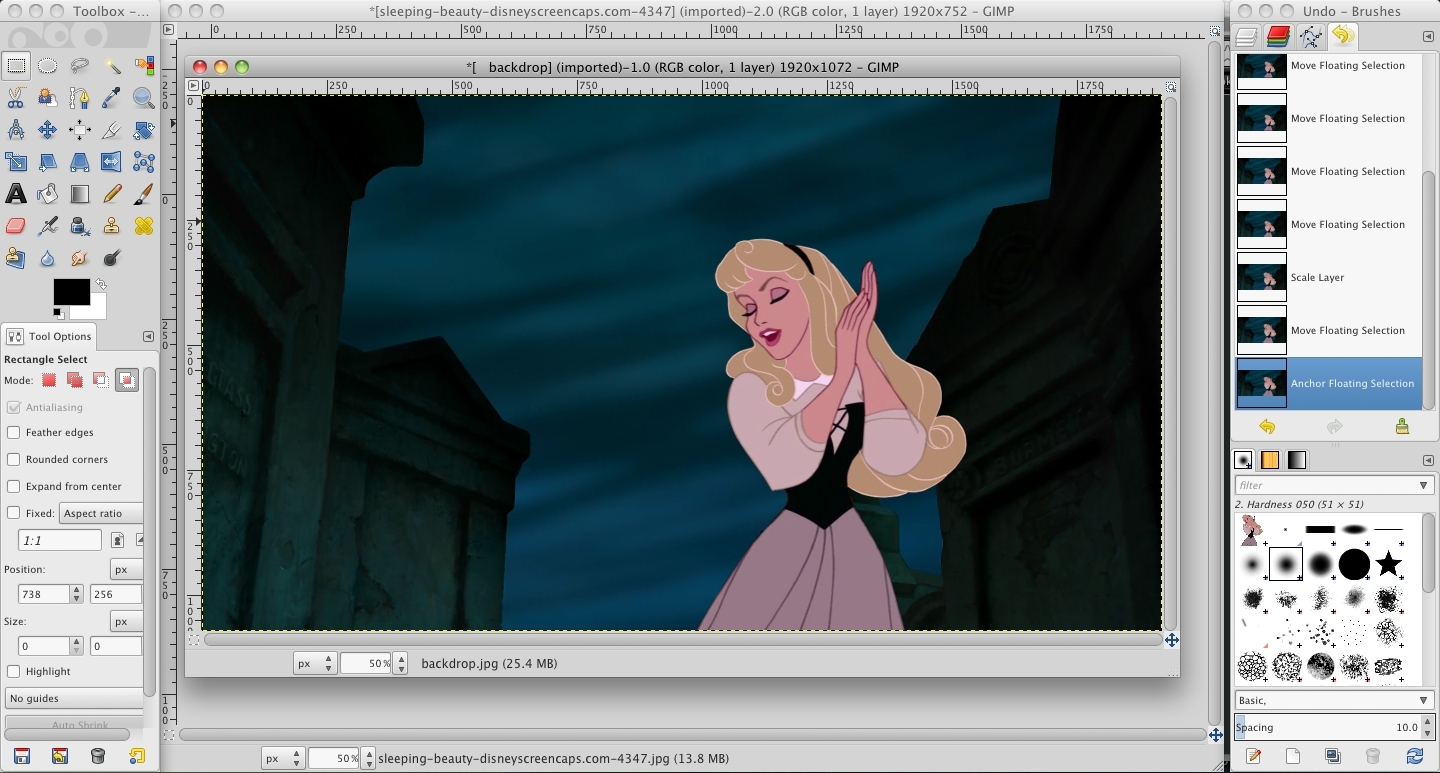
Hmm... she looks a bit small there. No worries, we can fix that easily. Just go to Layer>Scale Layer... and a pop up menu will appear. Change the unit of measurement from inches to centimeters, and estimate 의해 what percentage the character should be increased. I ended up increasing Aurora's size 의해 25%.
Here's the final result, our princess is a good size now!

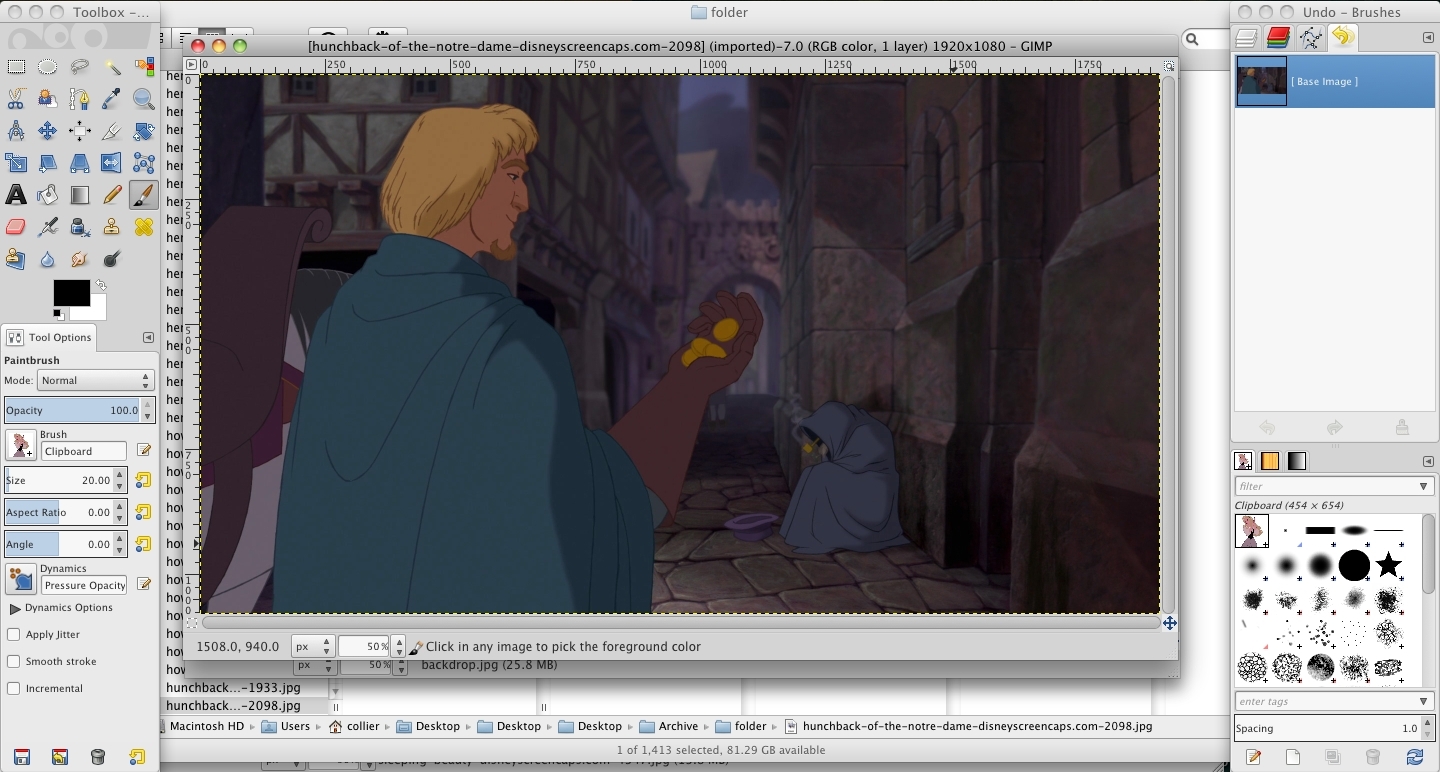
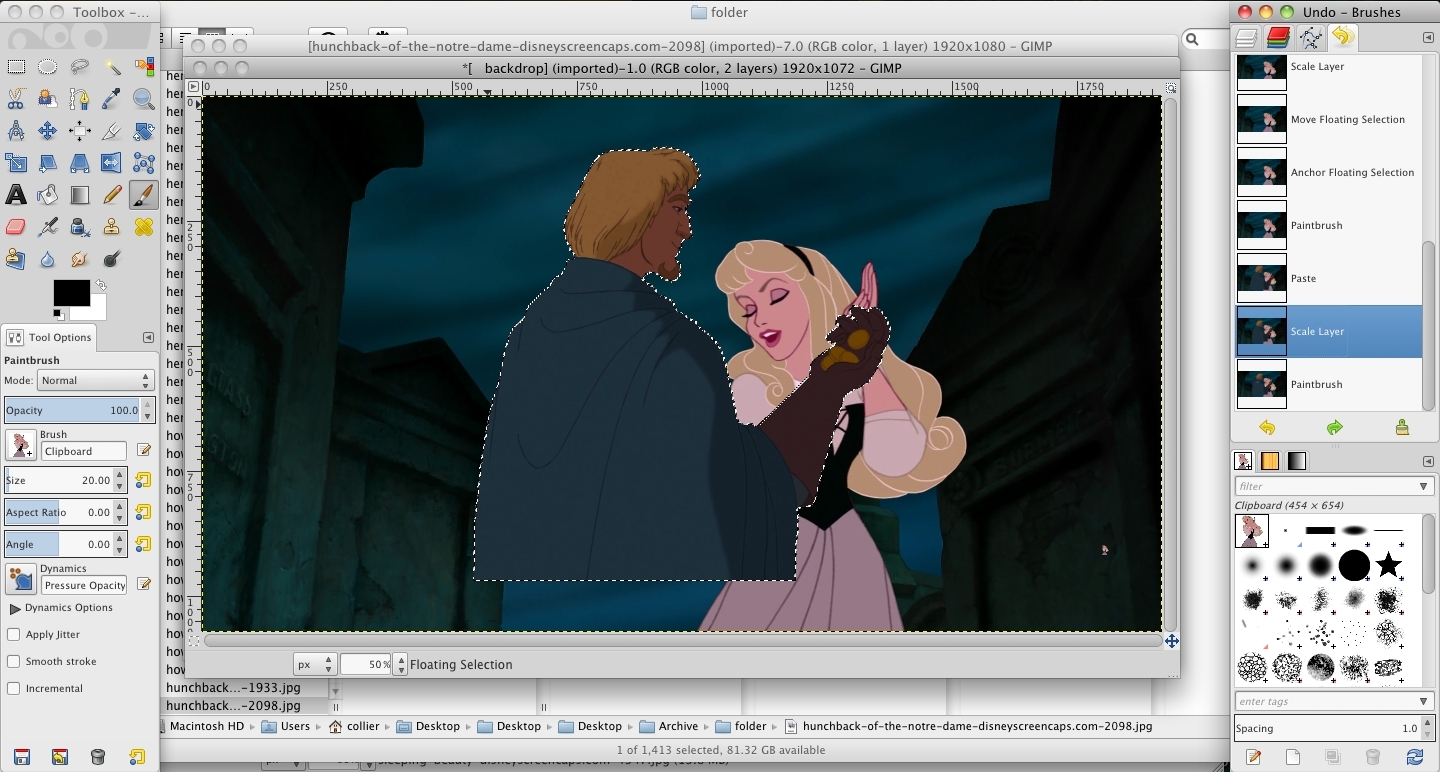
Now we have to add Phoebus to the picture. Open him up and repeat step two, and then paste him in with Aurora, like so:

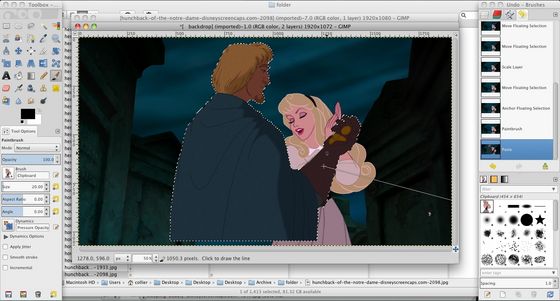
Hmm, Aurora looked too small, but I think Phoebus looks too big! Oh well, just scale accordingly and 옮기기 him with the 옮기기 Tool:

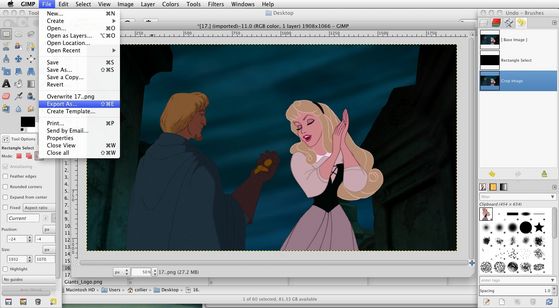
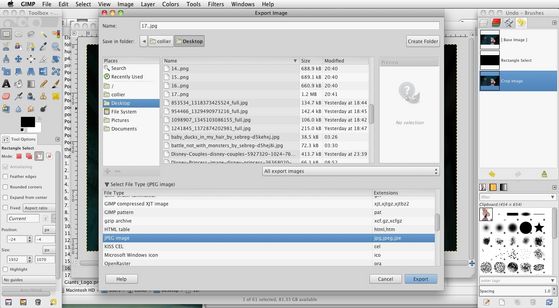
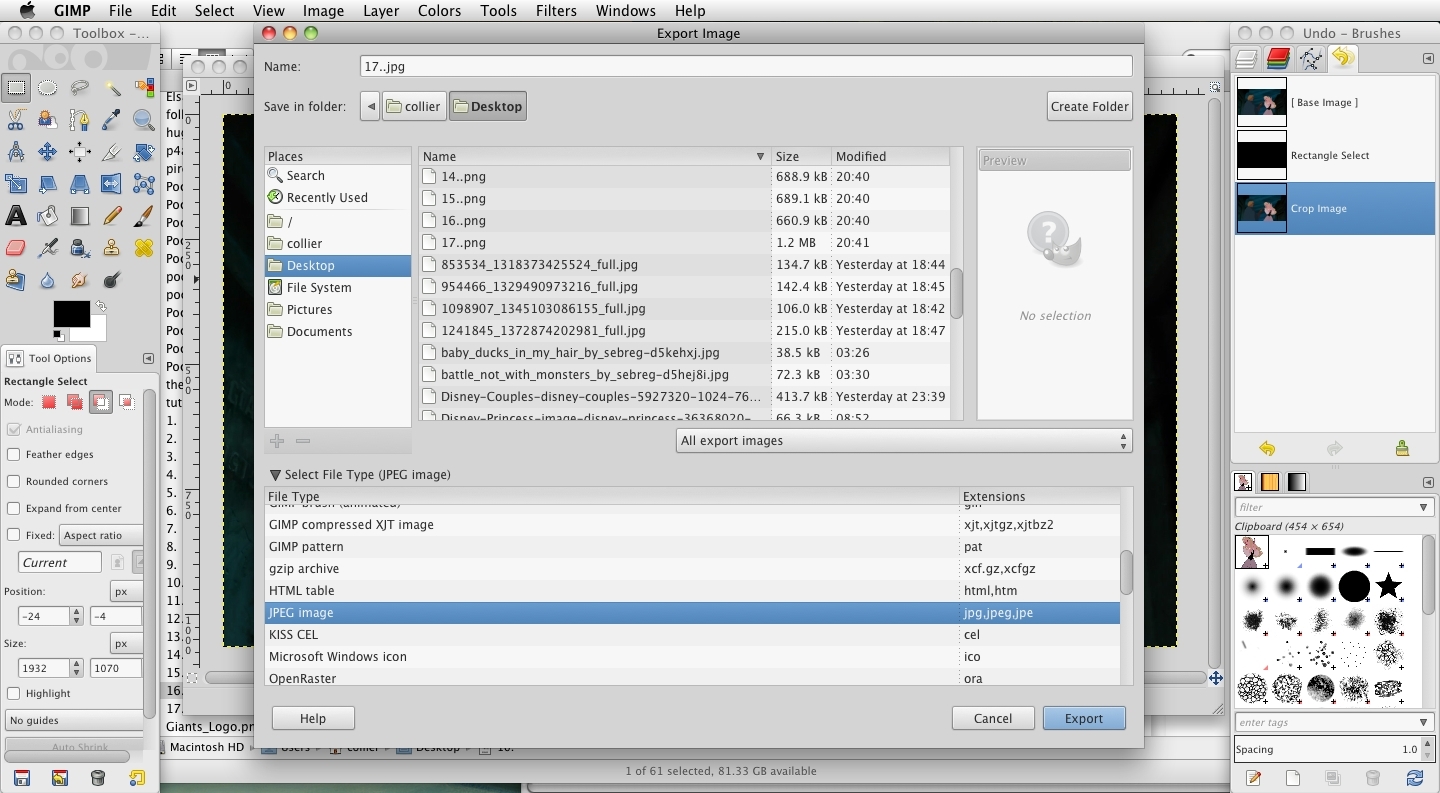
Doesn't that look nice! If 당신 want to add another character, just repeat Step Two with another screenshot, but if two characters is good for 당신 then we're ready to go. To save 당신 just go to File>Export As... and choose JPEG 또는 your preferred file type.
Step Four (optional): effects and whatnot
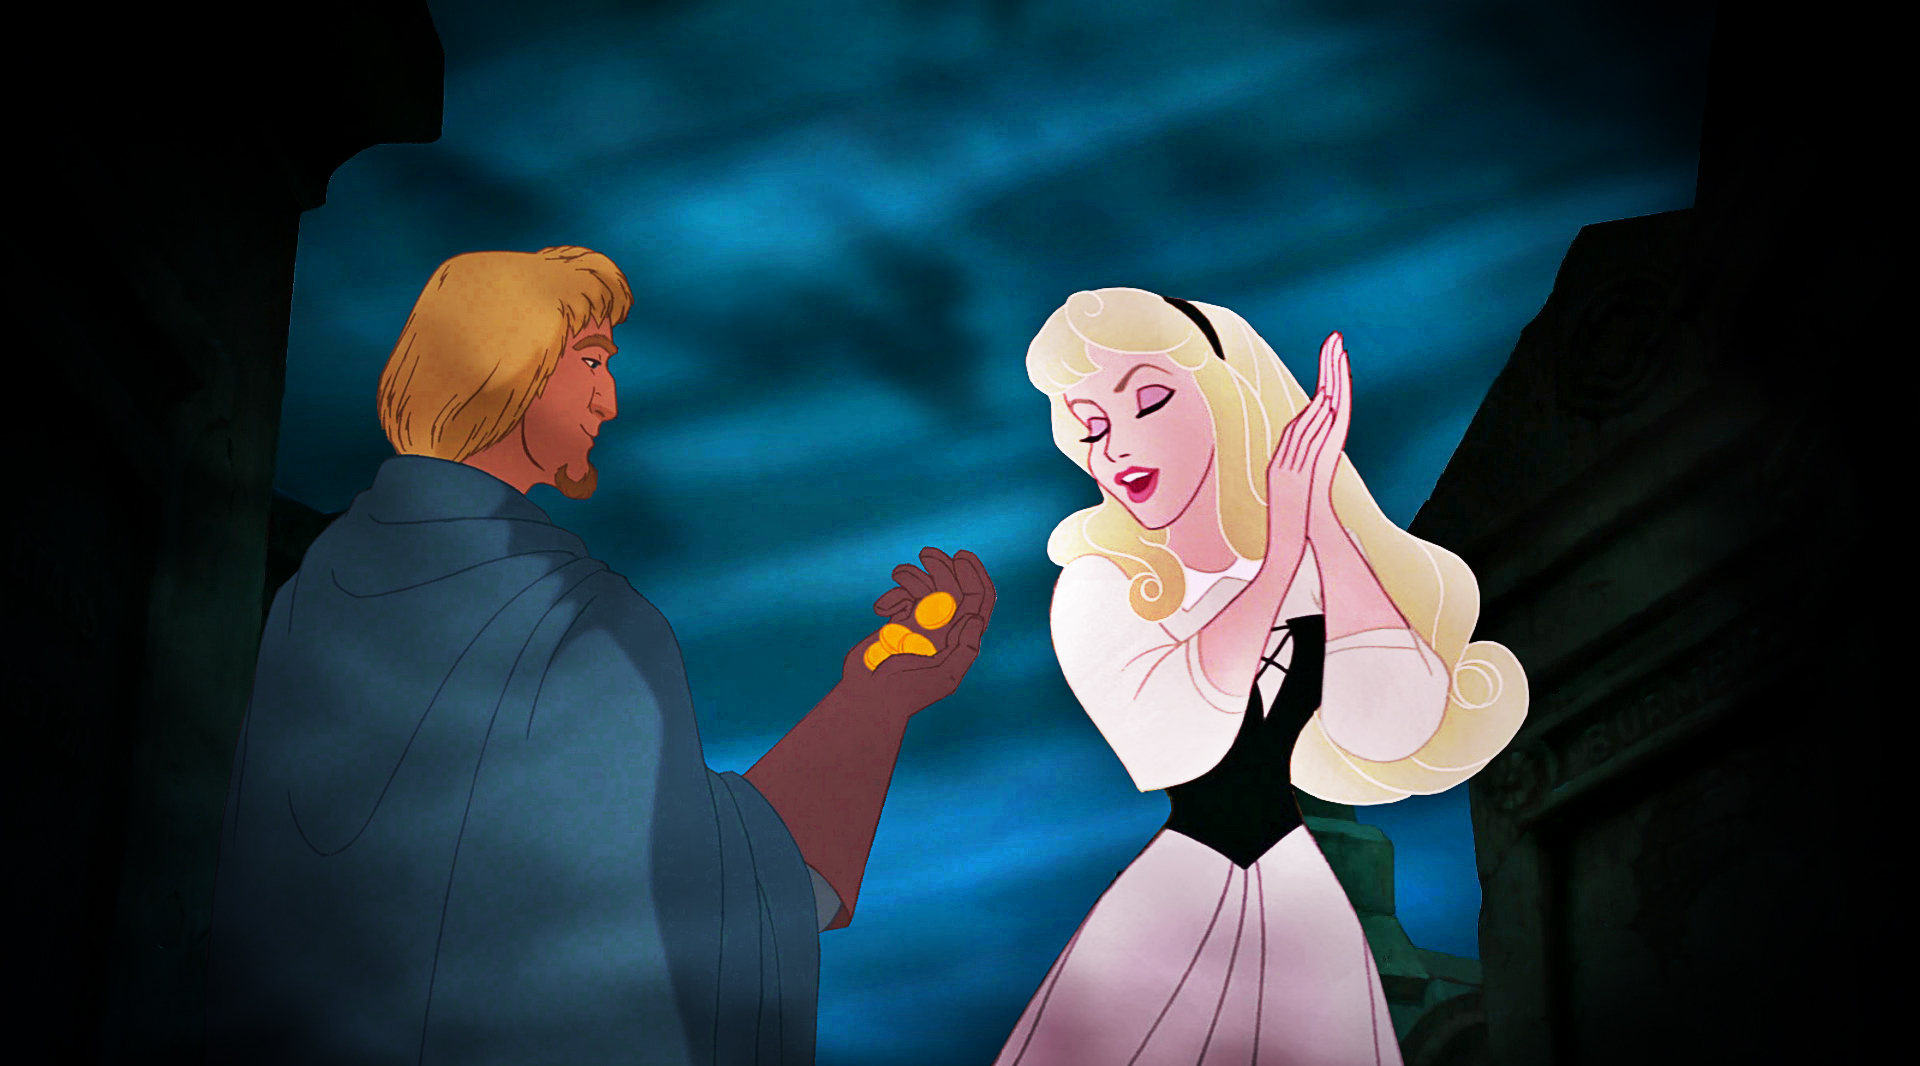
Well, here is the final result of the crossover:
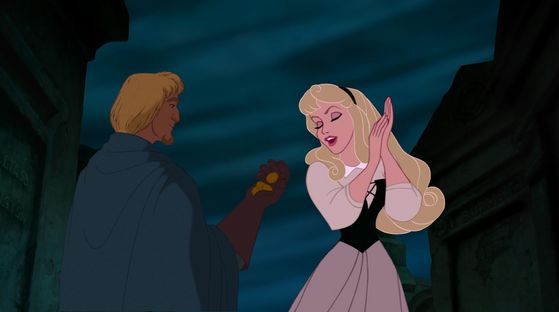
And if 당신 want to 당신 can go to Pixlr 또는 the editing site of your choice and add some effects, make it look fancy like this:

...But of course, that is optional.
--
Well, I hope 당신 guys liked my first tutorial, and I especially hope 당신 learned something from it! I actually made this for prussiaducky because she had no clue how to use GIMP, but I decided to make a full-blown 기사 in case anyone else could benefit from it. And all of this is just how I do things, if 당신 have your own way that 당신 like better 당신 should just do that!
Anyway, I hope 당신 enjoyed! Bye!
Step One: Compiling your pictures
For this tutorial I'm going to make a picture of Phoebus and Aurora together, so I'll need to get a picture of each of them. For the background of the image I could put Aurora in Phoebus' picture 또는 Phoebus in Aurora's, but I want this to happen in a spooky graveyard. This screencap from Princess and the Frog will do the trick. See, now I have three pretty little pictures lined up!
Step Two: Selecting Your Character
Okay, this is where 당신 need to start paying attention. Let's start with Aurora. Zoom in (use + to zoom) on Aurora to a degree 당신 find comfortable, and find the 'free select tool' in your toolbox. Then find a place on Aurora's outline, it doesn't matter where, and click. A dot should appear. To continue the line, just stretch your cursor away from your dot as far as 당신 wish, staying on Aurora's outline.
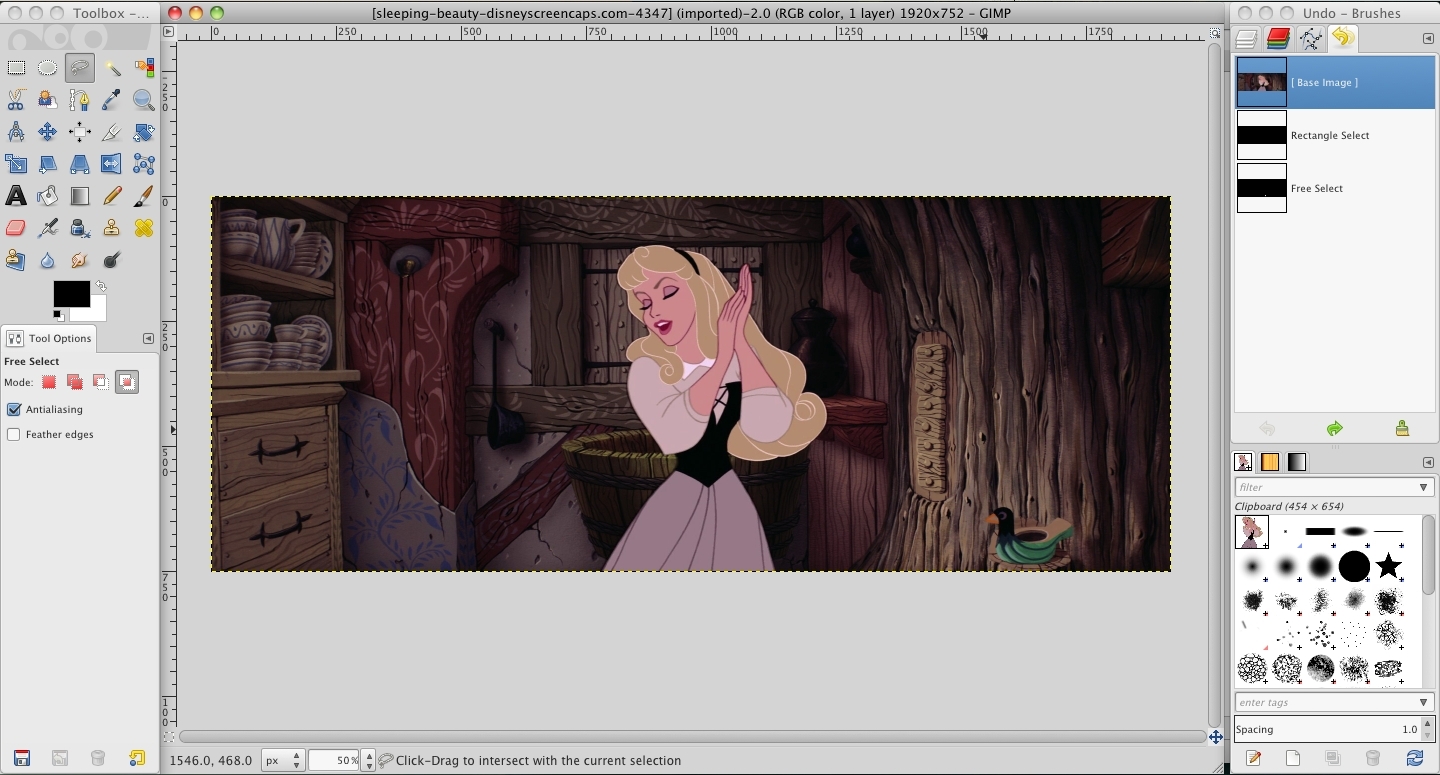
When 당신 want to turn 또는 tilt your line, just click on the corner and 당신 can make an angled line. Continue this for Aurora's entire outline, being extra careful on curvy parts.

When 당신 get to the end of Aurora's outline, just connect your cursor to your original line, as such:


Hopefully you'll end up with something like this:

Step Three: Putting your characters together
First copy what you've selected of Aurora using Command+C (or Ctrl+C for Windows). Then I'll want to open up my graveyard background:
And paste Aurora there using Command+V (Ctrl+V for Windows), and 옮기기 her to a good position with the 옮기기 Tool:
Hmm... she looks a bit small there. No worries, we can fix that easily. Just go to Layer>Scale Layer... and a pop up menu will appear. Change the unit of measurement from inches to centimeters, and estimate 의해 what percentage the character should be increased. I ended up increasing Aurora's size 의해 25%.

Here's the final result, our princess is a good size now!
Now we have to add Phoebus to the picture. Open him up and repeat step two, and then paste him in with Aurora, like so:

Hmm, Aurora looked too small, but I think Phoebus looks too big! Oh well, just scale accordingly and 옮기기 him with the 옮기기 Tool:

Doesn't that look nice! If 당신 want to add another character, just repeat Step Two with another screenshot, but if two characters is good for 당신 then we're ready to go. To save 당신 just go to File>Export As... and choose JPEG 또는 your preferred file type.

Step Four (optional): effects and whatnot
Well, here is the final result of the crossover:

And if 당신 want to 당신 can go to Pixlr 또는 the editing site of your choice and add some effects, make it look fancy like this:
...But of course, that is optional.
--
Well, I hope 당신 guys liked my first tutorial, and I especially hope 당신 learned something from it! I actually made this for prussiaducky because she had no clue how to use GIMP, but I decided to make a full-blown 기사 in case anyone else could benefit from it. And all of this is just how I do things, if 당신 have your own way that 당신 like better 당신 should just do that!
Anyway, I hope 당신 enjoyed! Bye!

“I’m game if you are.”

“Hey, Belle, I saved you a seat!"
 looked jealousy at them both.")
Melody smiled back at him, and Eilonwy (Taran's girlfriend) looked jealousy at them both.


"My name is Hercules"

It was during a party at their house


“Hey, Snow, can I borrow your-?”


I guess you could call this their wedding picture

Proteus and Kida dancing ~By: DIAMELA~